


The definitive professional guide to securing any load to drywall—safely, securely, and with confidence.
Every year, thousands of homeowners face the same frustrating scenario: a beautifully mounted mirror crashes to the floor, a floating shelf pulls away from the wall leaving ugly holes, or a cherished family photo hangs crooked because the anchor failed. The difference between a installation that lasts decades and one that fails within months lies not in the wall or the item being hung—but in understanding how to properly install hollow wall anchors.

Hollow wall anchors are specialized fasteners designed to provide holding power in walls with hollow cavities—most commonly standard ½-inch drywall found in modern homes. Unlike solid wall anchors that grip into masonry or wood studs, hollow wall anchors expand behind the drywall surface, creating a secure connection that distributes weight across a larger area.
The key to a successful installation lies in recognizing that drywall itself is surprisingly fragile. A standard ½-inch drywall panel can only support about 5 pounds per square foot when properly supported by studs—but can support significantly less when anchored only to the gypsum itself. This is why choosing the correct anchor type and installing it properly is not just a matter of convenience, but of safety and wall preservation.
Before selecting an anchor, you must first understand what you're hanging and how much weight it will need to support. Not all anchors are created equal, and using the wrong type can result in wall damage, failed installations, or worse—injury from falling objects.
Load Range: 0-25 lbs (0-11 kg)
Load Range: 25-75 lbs (11-34 kg)
Load Range: 75+ lbs (34+ kg)
Professional results require professional preparation. Before beginning your installation, ensure you have the following tools assembled and within reach:
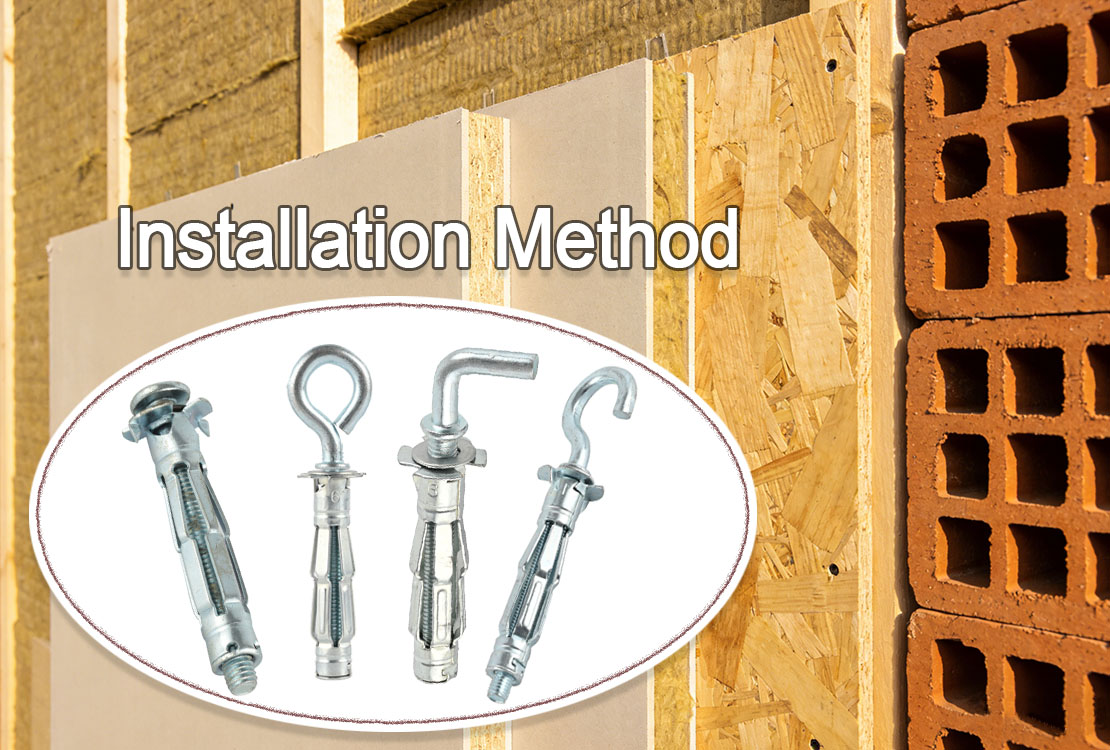
Understanding the different types of hollow wall anchors and their applications is fundamental to achieving professional results. Each anchor type has specific strengths and limitations that make it suitable for particular applications.
The most common and economical option, plastic expansion anchors work by compressing against the walls of the hole as the screw is tightened. They are suitable only for very light loads in solid walls or thin drywall and should be avoided for any application where safety is a concern. While inexpensive and widely available, these anchors have the lowest holding power and can pull out under excessive force.
Threaded drywall anchors, commonly known by the brand name "Zip-It," feature sharp, coarse threads that screw directly into the drywall without requiring a pilot hole. These anchors provide significantly better holding power than plastic expansion anchors and are ideal for medium-load applications such as towel racks, small shelves, and lightweight fixtures. They install quickly and cleanly, making them a favorite among DIYers and professionals alike.
Molly bolts represent a significant upgrade in holding power over plastic or threaded options. These metal anchors feature a sleeve that expands behind the wall as the central screw is tightened, creating a secure grip on the back of the drywall. Available in various lengths to accommodate different wall thicknesses, molly bolts can support substantial weight and are an excellent choice for applications requiring reliability without the complexity of toggle bolts.
Toggle bolts are the heavyweight champions of hollow wall anchoring. They feature spring-loaded wings that fold flat for insertion and then expand behind the wall to distribute weight across a large surface area. Capable of supporting 50-100+ pounds per anchor (depending on wall conditions), toggle bolts are essential for mounting large mirrors, wall-mounted televisions, heavy shelves, and cabinetry. While installation requires a larger hole and more effort, the holding power is unmatched.
Strap toggle bolts offer similar holding power to standard toggle bolts but with a unique flat metal strap that remains visible after installation. This design allows for easier removal and reinstallation of the mounted item without losing holding power. They are particularly useful for temporary installations or applications where the anchor may need to be relocated periodically.
With your tools assembled and anchor type selected, you're now ready to begin the installation process. Follow these steps carefully to ensure a secure, professional-quality result.
Use your stud finder to locate studs in the wall and mark them with pencil. While hollow wall anchors are designed to work without studs, mounting into a stud whenever possible provides the strongest possible connection. If stud mounting isn't possible for your application, mark the exact position where your anchor will go, ensuring it's at least 2 inches away from any stud edge to prevent splitting.
Use your level to ensure your marks are perfectly horizontal (or vertical, depending on your application). A crooked installation will not only look unprofessional but may cause unnecessary stress on the anchor over time.
Before drilling, use your stud finder's AC wire detection mode to check for hidden electrical cables in the wall. Additionally, hold a rare earth magnet near the marked location—it may detect hidden plumbing pipes or steel studs that weren't found by the stud finder. Never drill into a wall without taking this precaution.
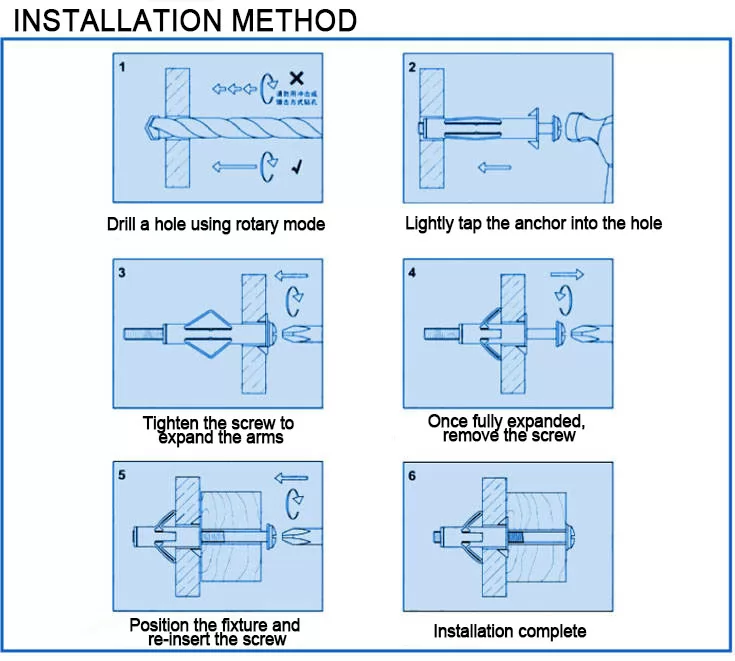
Select the correct size pilot hole for your anchor. For plastic expansion anchors and molly bolts, the anchor packaging typically specifies the required drill bit size. For threaded drywall anchors, no pilot hole is typically required—the sharp threads cut their own. For toggle bolts, you'll need a hole large enough to accommodate the folded wings.
Drill your pilot hole perpendicular to the wall surface, using steady, controlled pressure. Start with a smaller bit if you're unsure of the correct size—you can always enlarge the hole, but you cannot repair an oversized hole.
For plastic expansion anchors and molly bolts, gently tap the anchor into the pilot hole using a hammer until the flange sits flush against the drywall surface. For threaded drywall anchors, simply screw them into the drywall using a Phillips head drill bit or screwdriver—the threads should grip securely. For toggle bolts, insert the folded wings through the hole until they open behind the wall, then pull back gently to seat them.
For expansion anchors, thread the provided screw into the anchor and tighten with a screwdriver or drill. As you tighten, the anchor expands behind the wall, creating a secure grip. For toggle bolts, thread the screw through your mounting bracket (if using one) and into the toggle wings, then tighten until secure.
Critical: Do not overtighten. Over-tightening can strip the anchor's grip, weaken the drywall, or cause the anchor to spin freely behind the wall, destroying its holding power. Tighten just until snug—the anchor should not be able to move or rotate.
Before hanging your item, test the anchor's holding power by applying gradual downward pressure. The anchor should feel solid and immovable. If there's any movement, looseness, or spinning sensation, remove the anchor and start over with a larger anchor or different anchor type.
Once satisfied with the anchor's grip, hang your item and make any final adjustments. Use your level to ensure perfect alignment.
Use this reference table to quickly compare anchor types and their recommended weight capacities. Always err on the side of caution when selecting anchors—these ratings assume proper installation in standard ½-inch drywall.
| Anchor Type | Weight Capacity | Best Application | Difficulty |
|---|---|---|---|
| Plastic Expansion | 5-15 lbs | Very light decor, temporary installs | Easy |
| Threaded Drywall (Zip-It) | 25-50 lbs | Picture frames, small shelves, fixtures | Easy |
| Molly Bolt | 50-75 lbs | Medium shelving, towel racks, mirrors | Moderate |
| Toggle Bolt | 75-100+ lbs | Large mirrors, TVs, heavy cabinets | Moderate |
| Strap Toggle | 100+ lbs | Extra heavy loads, commercial applications | Advanced |
Even experienced DIYers can make critical errors when installing hollow wall anchors. Knowing these common mistakes will help you avoid the frustration of failed installations and potential wall damage.
The most common mistake is selecting an anchor based solely on price or availability rather than the actual load requirements. A plastic expansion anchor that costs pennies may seem like a bargain until your expensive mirror comes crashing down. Always match the anchor to the load.
An oversized pilot hole prevents the anchor from expanding properly or achieving a secure grip. If your anchor spins freely after installation, the hole is likely too large. Start with a smaller bit and gradually enlarge as needed.
Excessive tightening compresses the drywall around the anchor, weakening the grip and potentially causing the anchor to fail. Tighten until snug—typically 2-3 turns past finger tight—then stop.
Not all walls are created equal. Older homes may have different drywall thicknesses, lath and plaster walls, or multiple layers of paint that affect anchor performance. Always test your anchor choice in an inconspicuous location first if you're unsure about your wall's composition.
Never assume an anchor is secure without testing it first. A simple pull test takes seconds and can prevent catastrophic failures later. If the anchor moves or feels loose, remove it and start over.
Once you've mastered the basics, these advanced techniques will help you achieve even more secure and professional-looking installations.
For maximum security, combine hollow wall anchors with wall studs. Mount your item so that at least one mounting point goes directly into a stud, while using hollow wall anchors for additional support. This hybrid approach provides the security of stud mounting with the flexibility of anchor placement.
For heavy mirrors and artwork, consider a French cleat installation. This technique uses two interlocking angled strips—one mounted to the wall and one to the back of the mirror—which gravity helps seat securely. Combined with appropriate anchors, this method provides exceptional security and easy removal for repositioning.
For particularly critical installations, you can reinforce hollow wall anchors by applying a small amount of construction adhesive into the pilot hole before inserting the anchor. This creates an additional bond with the drywall substrate. However, this makes removal significantly more difficult, so use this technique only for permanent installations.
Installing hollow wall anchors properly is a skill that serves homeowners for a lifetime. Whether you're hanging a simple picture frame or mounting a heavy television, the principles remain the same: choose the right anchor, install it correctly, and always err on the side of caution. Your walls—and your safety—will thank you.
Remember: a few extra minutes spent on proper installation can prevent years of frustration, costly repairs, and potential injury. Now you're ready to tackle any wall-mounting project with the confidence of a professional.


.png)